Deepest apologies to Sheridan Smith.
I was sketching along to one of Court Jones’ caricature lessons over on Proko.com using a reference photo which had good lighting and strong features — just what you need to practice caricature. It was only after I’d finished drawing that I noticed the eye positions. I’ve had this problem before, and I frequently use the ‘fresh eyes’ approach to take a break and see any inaccuracies in the drawing. But I definitely have an inability to see how the complete picture is working as a whole as I’m drawing all the smaller elements. Maybe there’s a term for this — ‘drawing blindness’, perhaps.
One solution to this is to build up the portrait systematically using a basic construction of the big shapes before going to the smaller forms within them, and then, finally, move on to the details. Don’t draw the small shapes until the big shapes are working.
It also helps to be aware of the many ways in which a portrait can go wrong. Sometimes it’s not a big mistake, like an eye in completely the wrong position, but an accumulation of smaller errors which might seem insignificant in themselves but which add up to a face which somehow just doesn’t look right.
Here are a few examples of the ways a portrait can miss the mark, taken from the pile of charcoal quicksketches on the endless computer paper.

The perspective lines for the eyes don’t match the rest of the features, making the far eye look too small.
Often the far eye in a portrait does appear smaller as it’s farther away, but the rest of the face needs to match, and any parallel construction lines need to share the same vanishing point. The difference in size in the features seen in three-quarter view will depend on how close you are to the subject — if you’re up close, there will be a more noticeable difference.

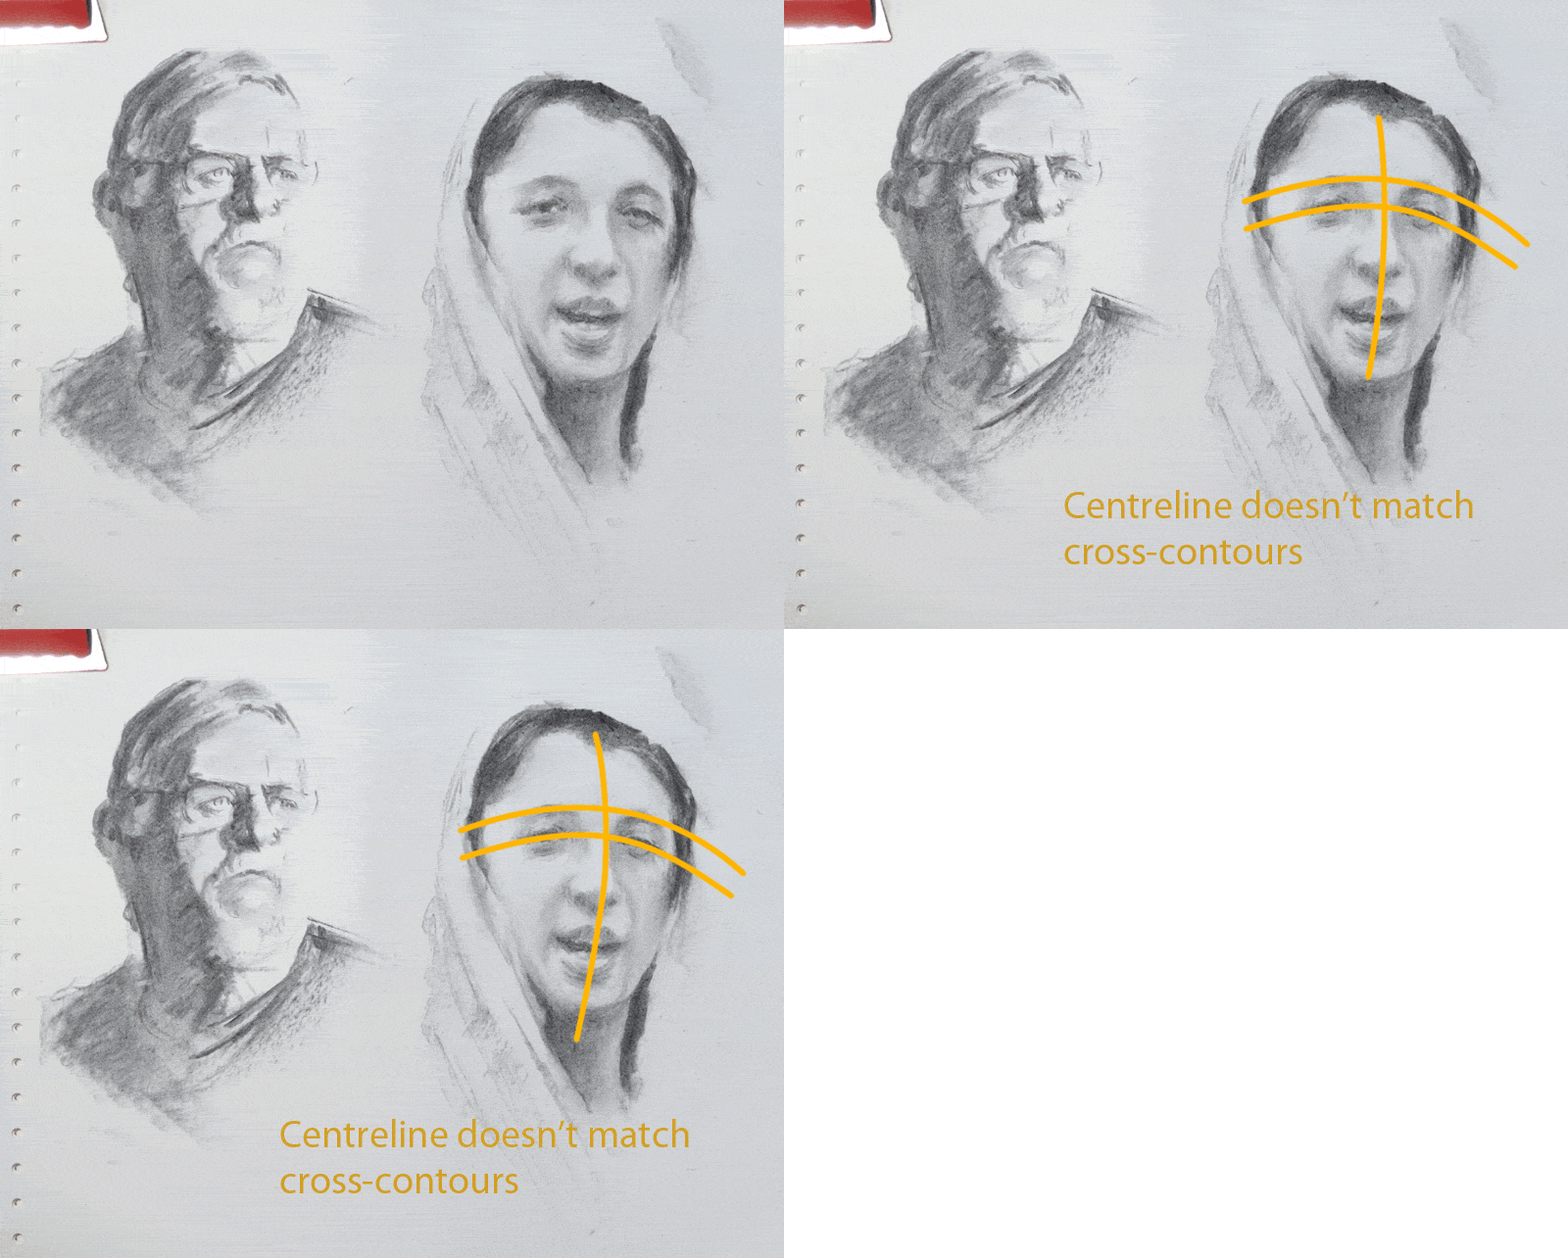
If the axis lines for the features and the centreline of the face don’t match, the face looks skewed. This can make an eye look too high, or a mouth slanted, or just give the sense that the features don’t quite hang together.

If the face is holding an expression which isn’t symmetrical (or the features themselves aren’t symmetrical) then axis lines can only provide a starting point. Is the mouth shifted to the side because of the expression (blue face) or because of inaccurate drawing (red face)?

Is Stan smiling with a sideways smile? Hard to tell when you can’t see both sides of the face. It’s often helpful to draw construction lines through the form even when you can’t see the hidden side, as though the head is made out of glass.
Stan Prokopenko has made a number of really useful videos on head construction. Here’s one which uses an intuitive approach to constructing the basic head structures.

An off-centre view combined with an asymmetrical expression can make centrelines hard to find. The corrected version in the animation above shows the more accurate centreline as taken from the reference photo. That said, the drawing has other elongations and distortions which confuse the final result and make the face appear slightly flattened.
There are so many factors which will influence the final appearance a portrait and so many ways to get there: Loomis methods, Reilly methods, Asaro heads, skull anatomy, caricature, tonal block-ins. (See Jeff Watts demonstrating some of the methods in this video.) I think there’s something valuable to be taken from all of them, and the aim is to have them all available as tools that can be used intuitively.