
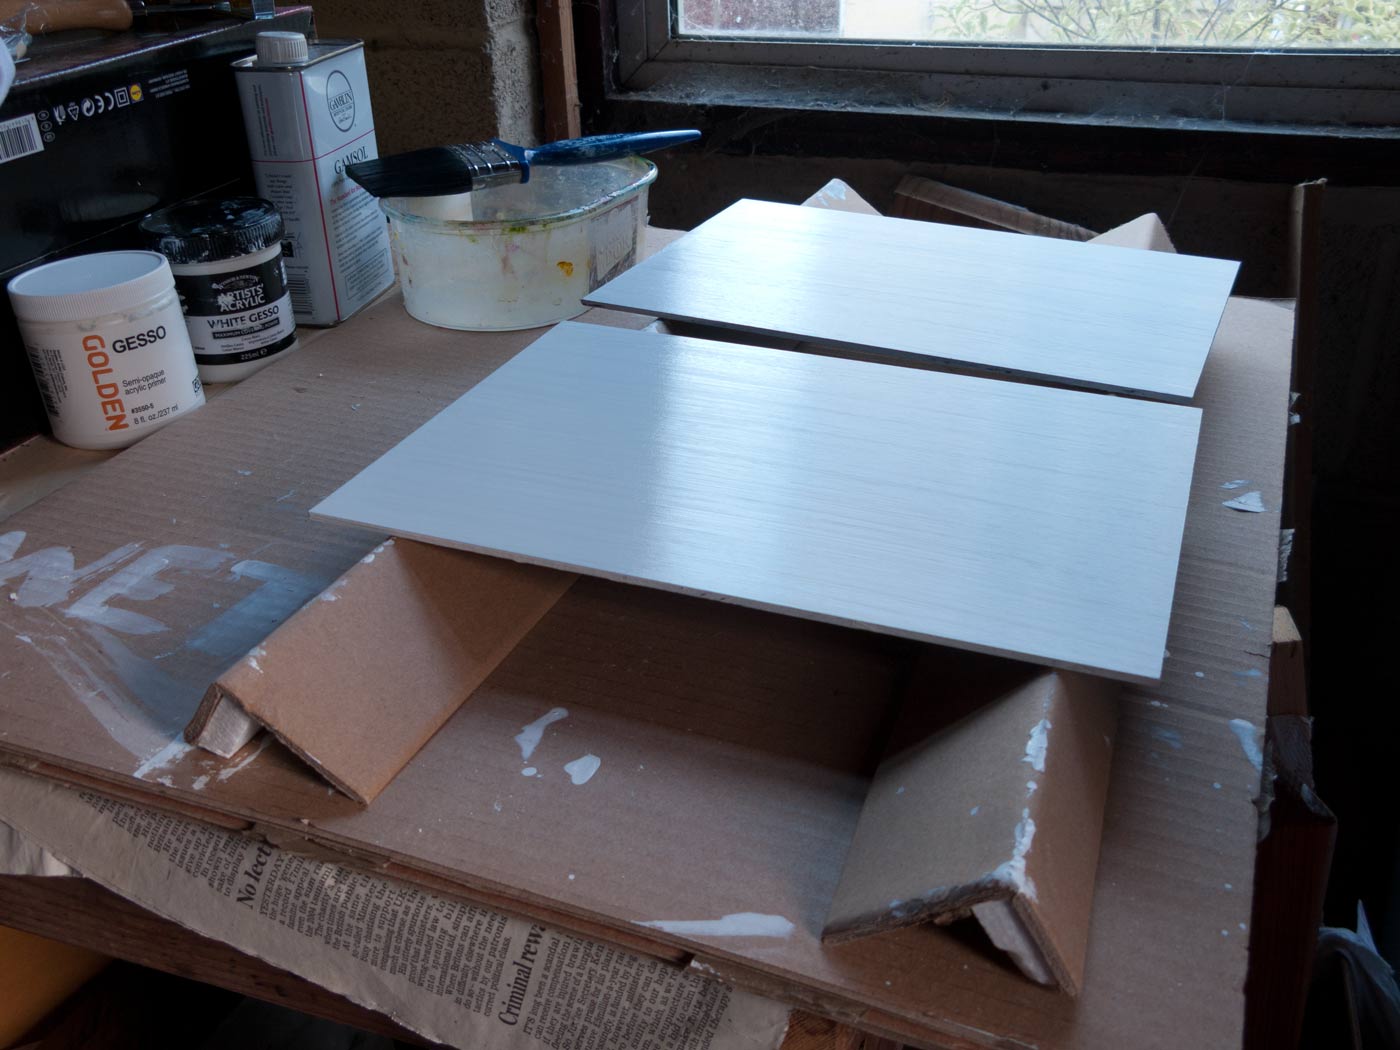
First layer of acrylic gesso on A4 aluminium composite panels.
I had been meaning to experiment with using aluminium composite as a support for some time as it has many useful properties:
- It doesn’t warp much, even at fairly large sizes (up to at least a metre).
- Takes up much less space than stretched canvas.
- Doesn’t rot, split, degrade or otherwise fall apart (so I’m told).
- Provides a solid surface (which I prefer) compared to the bounciness of stretched canvas.
A friend who works in a sign shop gave me an offcut to experiment with. This is 3mm aluminium composite (a sandwich of two thin sheets of aluminium with a polyethylene or polyurethane core). Some kind of polycarbonate surface is baked on at the factory and can come in a range of colours. It’s this surface rather than the aluminium itself which the painting ground will adhere to. Painting on bare aluminium can apparently lead to adhesion problems due to aluminium forming a thin (and crumbly) layer of oxide on its surface.
Preparation
I basically followed the instructions given by Kate Stone in her very useful post More Apocalypse-Surviving Panels which gives all the details about how to prepare these panels. I suggest you go there if you need step-by-step instructions. I went with the ‘acrylic dispersion ground’ option as I’m used to painting on acrylic ground and it seems to be the simplest method.
So the trick is to lightly abrade the coloured surface enough for a layer of acrylic gesso to form a mechanical bond. I used a medium grit sandpaper to create an even scuffing of the surface, enough to take the shine off the surface but not enough to wear through to the bare aluminium. I did try using a small electric sander but found it created hot-spots of bare aluminium, so doing it by hand is the way to go.
After sanding the surface and smoothing down any sharp edges, clean the surface with rubbing alcohol (I used a bit of Gamsol) to remove the dust and grease. Then build up thin layers of acrylic gesso using a house-painting brush. Four layers seems to give complete coverage (see the right-hand section of the test panel in the photo). Allow each layer to dry before applying the next and alternate the direction of the brush strokes for each layer. Many thin layers will be mechanically stronger than fewer thicker ones. Add a little water to the final layer for a super-smooth surface if desired, but I prefer a surface with a little more tooth provided by the ridges from the application brush.
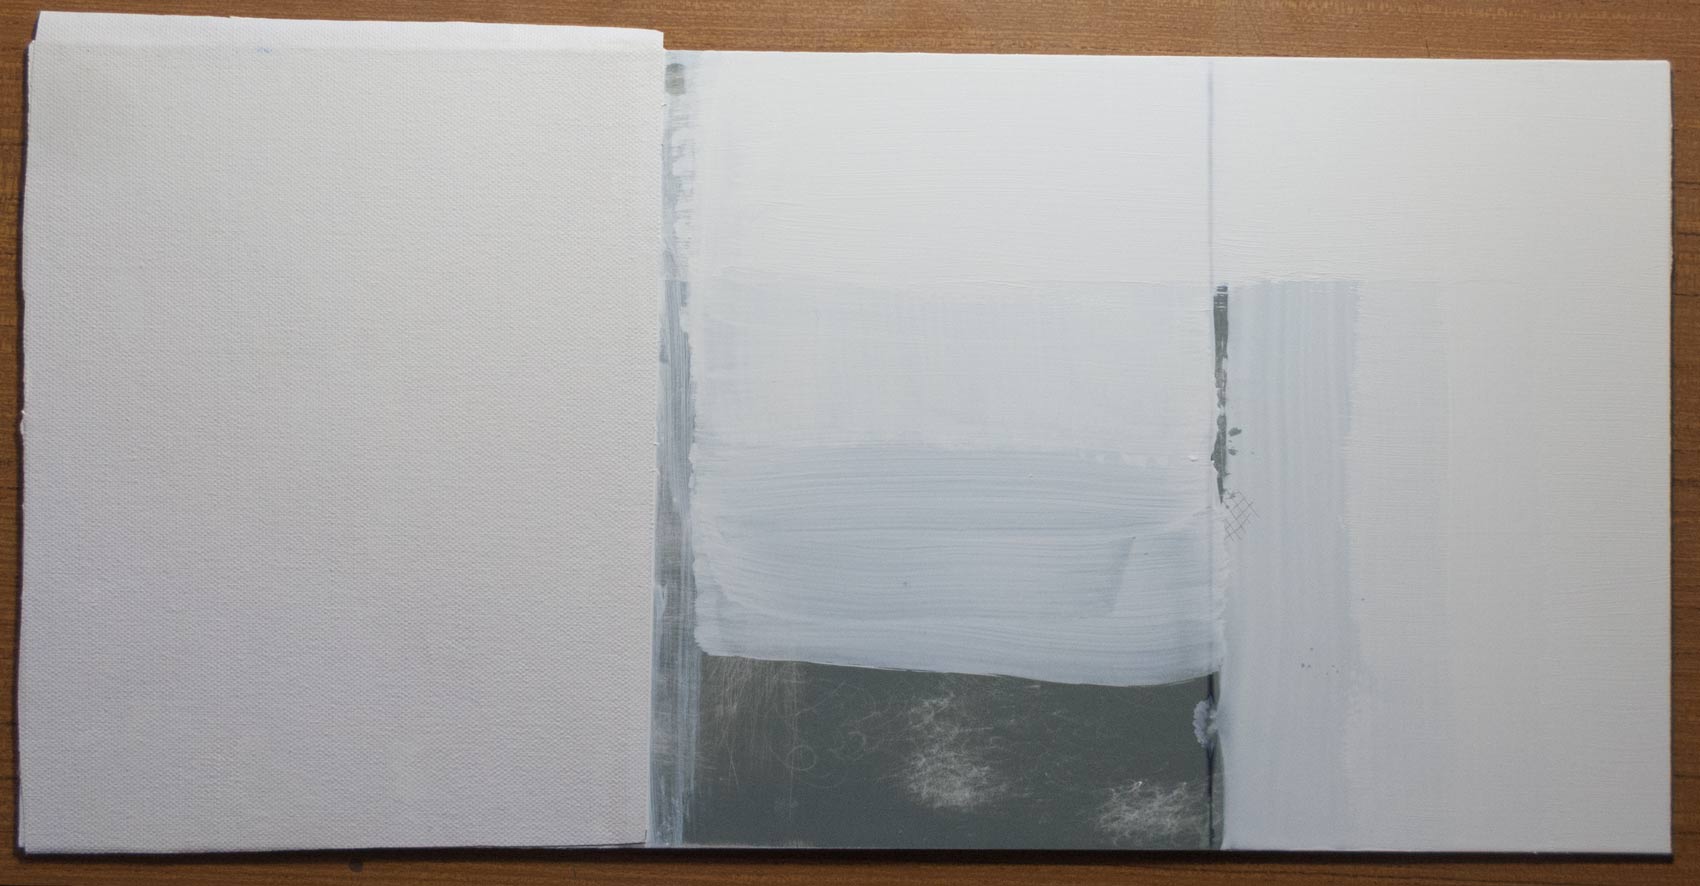
Testing on an offcut of aluminium composite. Left: Canvas sheet attached with acrylic gesso; Middle: gesso over a base of GAC100; Right: four layers of acrylic gesso.
I also experimented with attaching a sheet of loose canvas to the panel using either PVA glue or GAC100 (a type of acrylic used for extending acrylic paint and for sealing surfaces). I didn’t find either was a particularly good adhesive in my limited experiments.
Compared to the other two, the best adhesive by far was, once again, acrylic gesso. I sanded and cleaned the panel surface as before, and added one thin layer of acrylic gesso which I allowed to dry. The second layer of gesso was a bit thicker as some of it would need to soak in to the weave of the canvas. After smoothing out the canvas with a brayer to remove any wrinkles or air bubbles, I put a layer of plastic wrap from some old packaging on top, then weighed the whole thing down with a flat board and anything heavy I could find.
There is one problem at this stage, which is that the wet acrylic gesso is effectively sandwiched in an airtight layer between the non-porous panel and the plastic protective sheet on top, making it slow to dry. I conducted these tests in a damp midwinter, so dryer, warmer conditions might help. Once or twice I would remove the weights and plastic for half an hour to let the surface breathe before weighing down again.
It seemed to work well. The canvas surface was very even. As a test I peeled back the canvas from the panel and, although it wasn’t welded on, it required a fair amount of pull to remove it, and it peeled back evenly with no bubbles or weak points, suggesting a good bond.
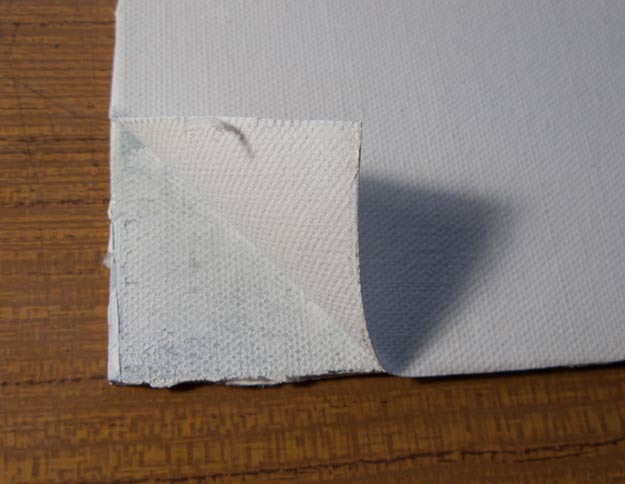
Canvas sheet adhesion test.
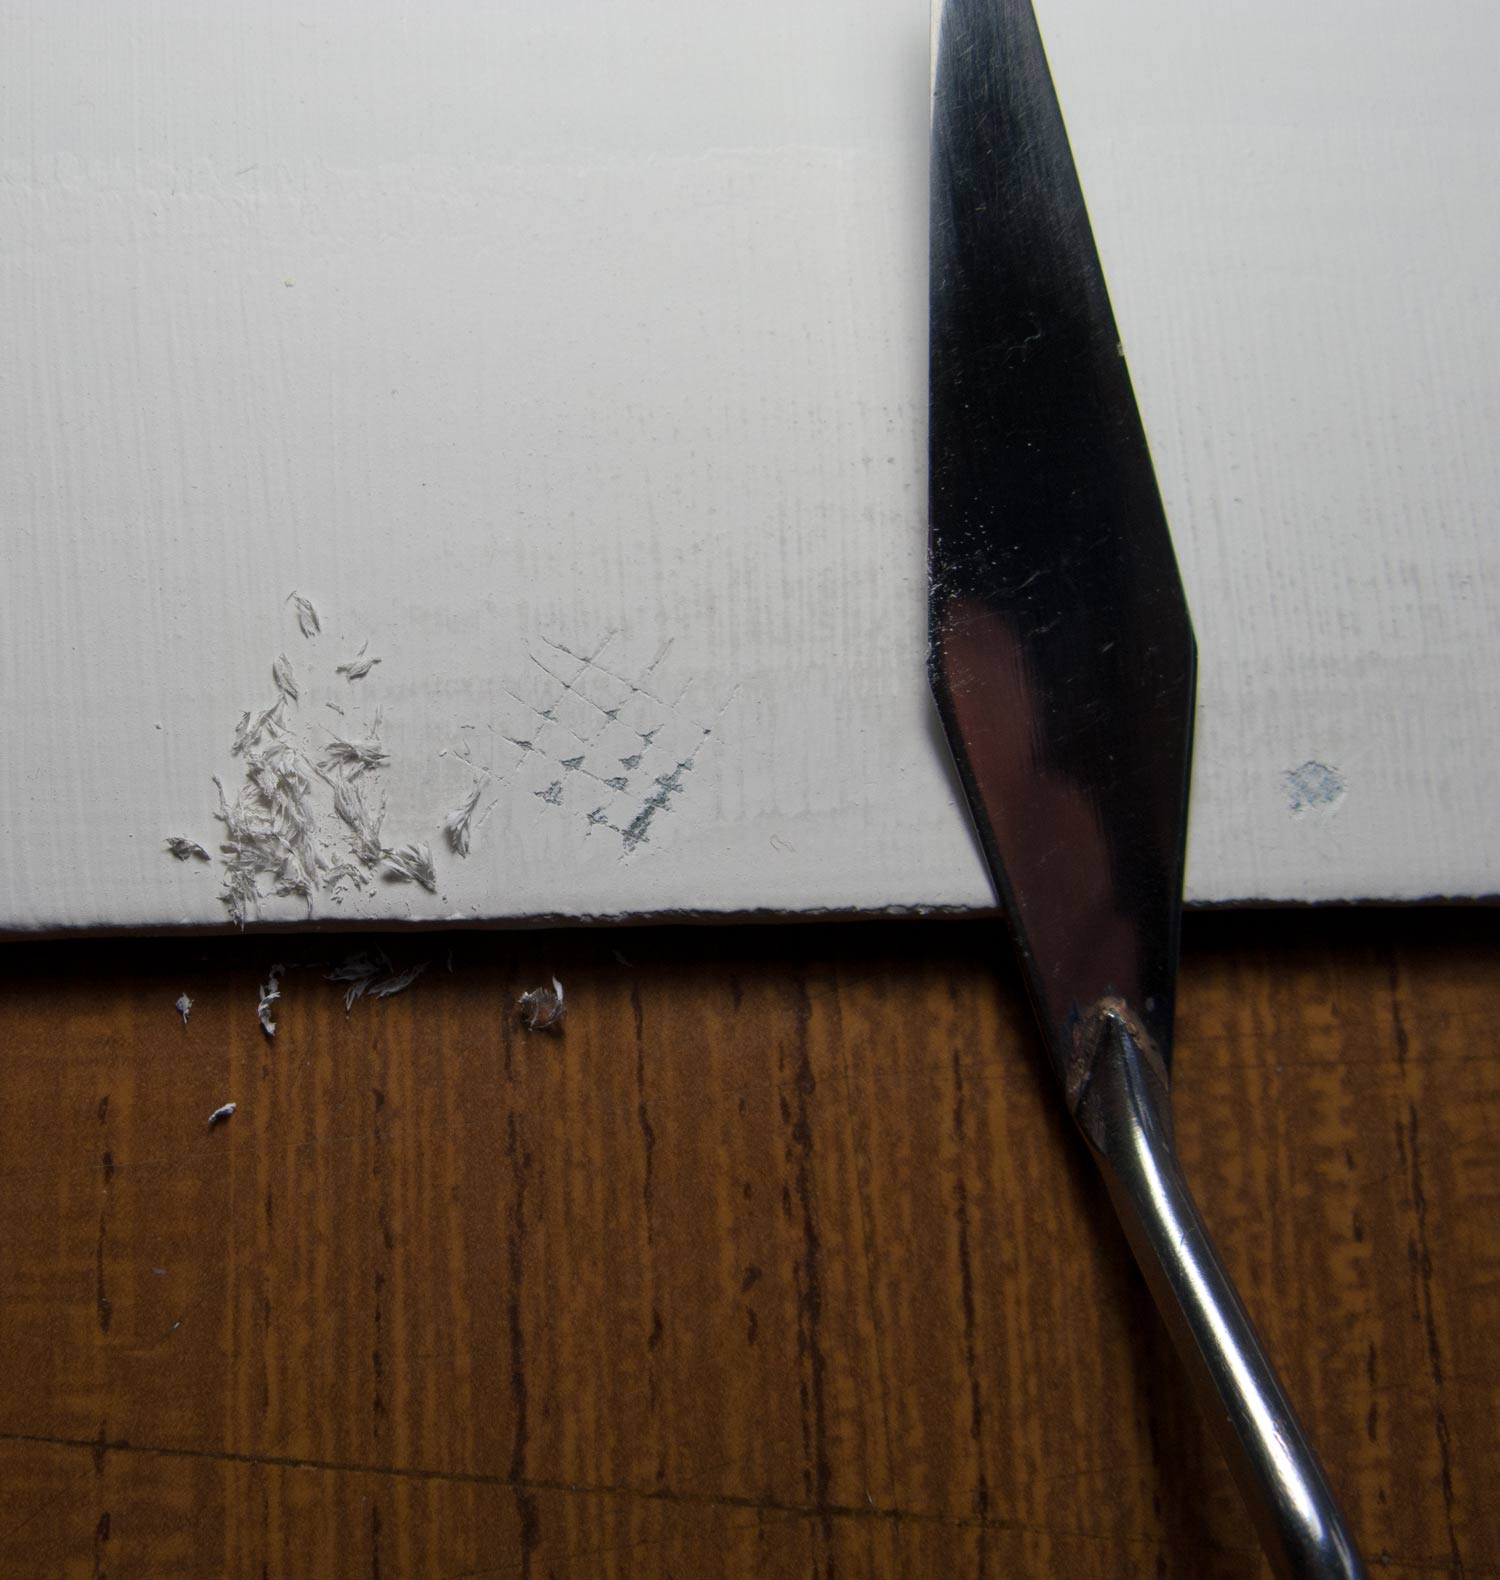
Panel abuse with screwdriver and palette knife.
I then attacked the plain gesso surface with a screwdriver. I gouged in a crosshatch of lines a few millimetres apart then stuck on some adhesive tape as firmly as possible before ripping it off. Next, I scraped away at the surface with some force using the edge of a metal palette knife. The results of all this abuse can be seen in the photo. The gouged squares did lose some of the paint from the corners where I repeated scraped at them, but this was limited to the corners where the screwdriver had already broken the surface right down to the aluminium. The whole square didn’t come away and nothing suggested that this was a weak or flaky surface.
So based on my limited testing, either a plain acrylic gesso surface or canvas glued to the panel with acrylic gesso will provide a solid ground for oil painting.
Suppliers
Aluminium composite comes under many trade names (one of the original manufacturers sells it as Dibond). Many brands are cheaper Chinese imports and I’ve heard they can vary in the thickness of the aluminium layers and in the material used in the central core. It’s not always clear exactly which brand you’re buying, and some suppliers advertise as Dibond but say they may substitute for an equivalent brand. For our purposes, we just need a panel that won’t warp or dent too easily.
Some people buy large panels and cut them to size using a table saw, or even cut the panel with a craft knife and some determination. (See Amanda Teicher’s video on cutting panels by hand, which contains useful advice on preparing Dibond in general).
I shopped online for a supplier who would cut panels to any size. The single-sided panels are much cheaper (the reverse side is bare aluminium) but only come in white; a coloured surface would make it easier to ensure an even coverage of gesso. After including delivery costs and VAT, it worked out at roughly £1.70 for an A4 panel and £3.40 for A3. By comparison, the cheapest uncradled gessoboard found online costs around £5 for a 20 x 30 cm panel (roughly equivalent to A4 size) and around £9 for 30 x 40 cm (roughly A3). Of course, there’s still the time and effort needed to prepare the aluminium panels and the cost of a tub of acrylic gesso, but it’s certainly affordable.
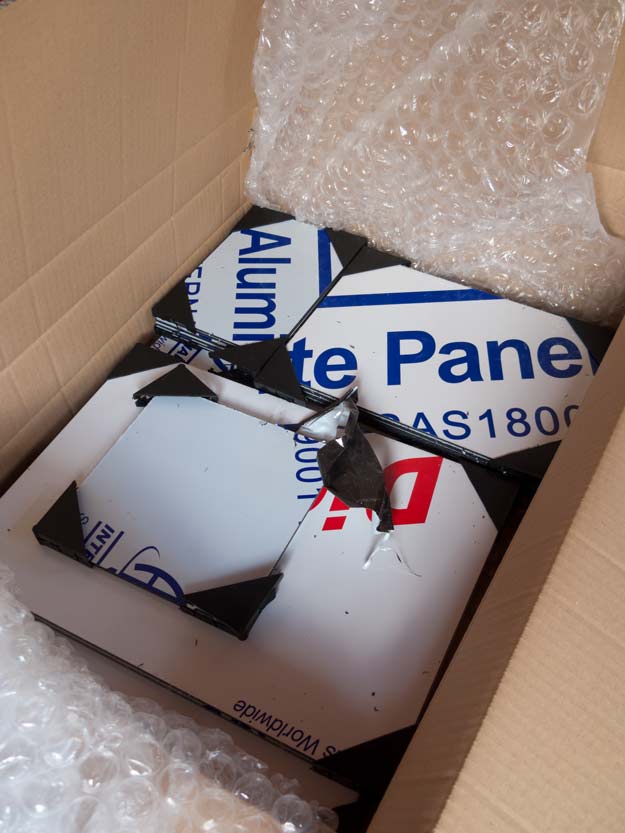
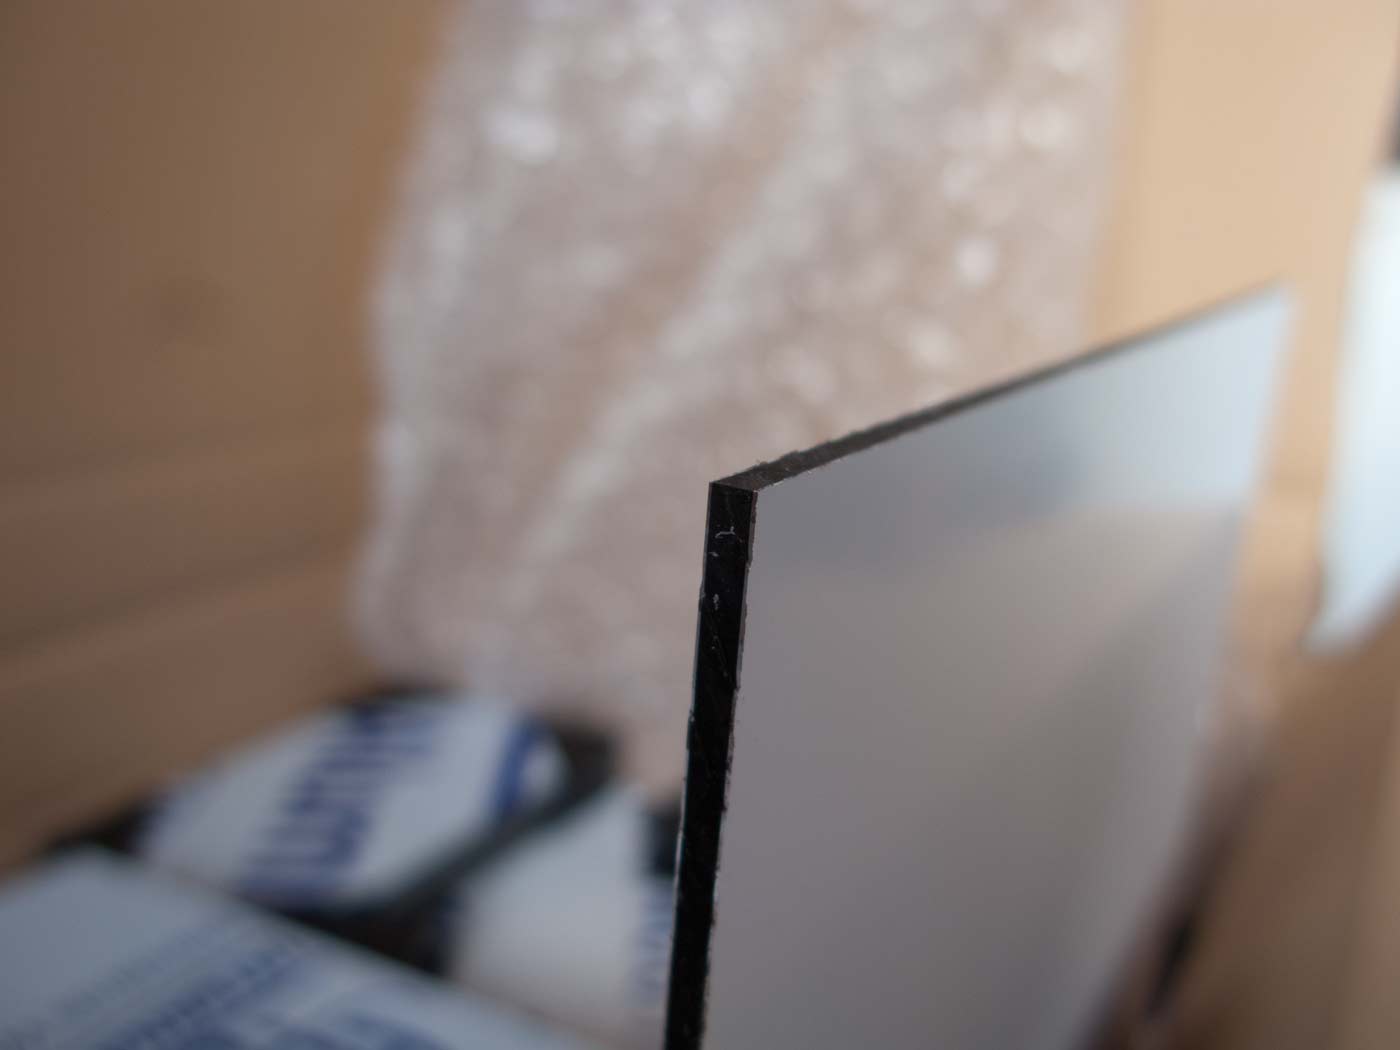
On delivery, I found that the aluminium sheets in the composite sandwich were slightly thinner than the sample I had been working with. It felt slightly less rigid but was still almost free of any warp at A2 size (420 x 594 mm), and being non-porous there is less concern about the effects of primers or water-based grounds causing warping. So no need for sealing, or priming both sides, or bracing, which might be necessary for wood-based supports.
And there’s something to be said for preparing your own panels. Before you’ve even laid down the first brush stroke, you’ve invested some time, effort and care into creating this surface.
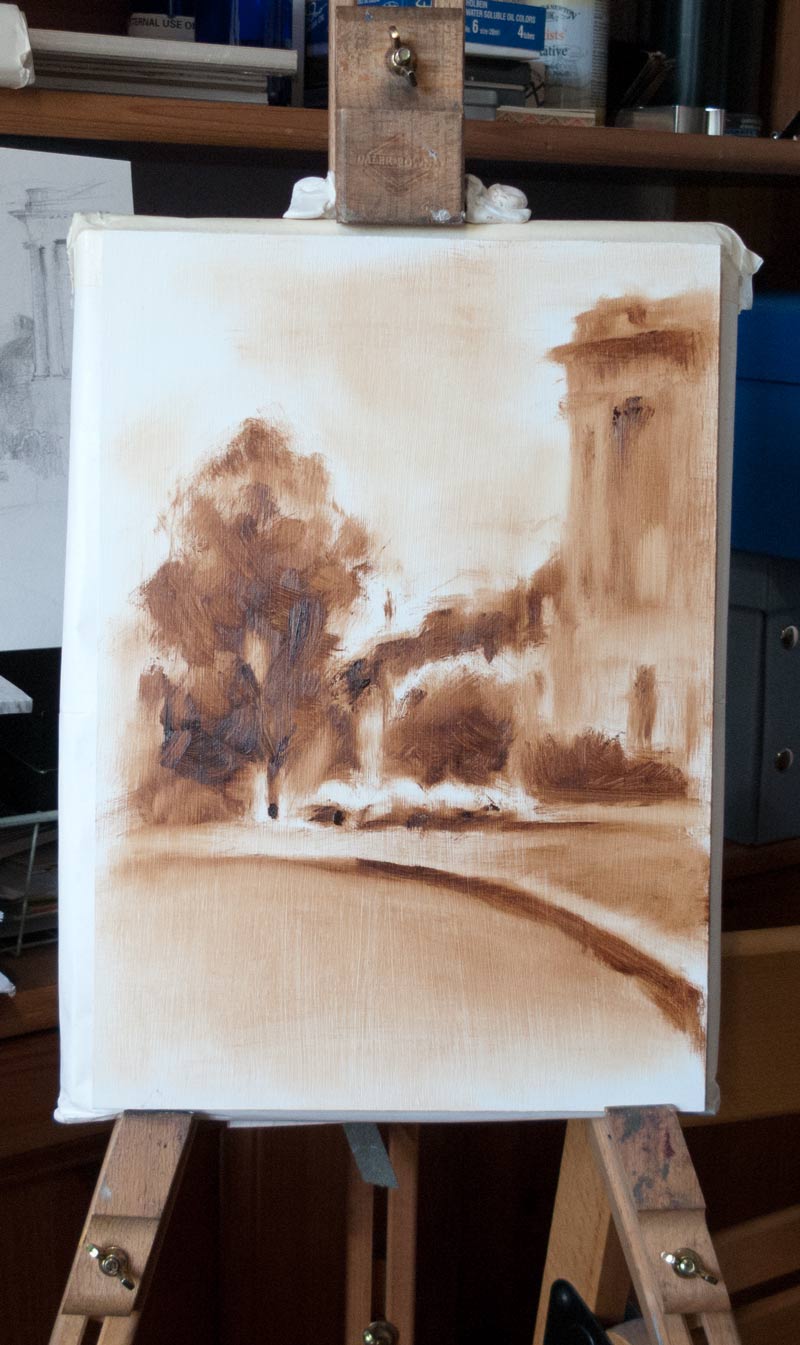
But what’s it like to paint on? It’s too early to say at the moment, but first impressions are good. I created this wipe-out underpainting using only burnt umber oil paint straight from the tube with no solvents. The paint could be easily faded back with kitchen paper, and the slightly toothy surface took the paint evenly from the brush.
To be continued…